Prehistoric Farm Beginner Guide: Digging, Hatching, and Progression Tips
Master Prehistoric Farm on Roblox with our beginner guide covering fossil excavation, dinosaur care, efficient shovel upgrades, and essential progression strategies.
Published: Prehistoric Farm Wiki Editorial Team
Table of Contents
Getting Started: Your First Dig in Prehistoric Farm
To succeed in Prehistoric Farm, you must understand the core gameplay loop: excavate fossils, hatch dinosaurs, and upgrade your equipment. Players start on the home island with a basic wooden shovel. Your immediate goal is to locate a glowing digging spot, hold the action button, and release it precisely when the meter enters the green zone. This timing-based mechanic is crucial because successful, well-timed digs offer a higher probability of unearthing valuable fossils.
Avoid the common mistake of spending all your initial currency on cosmetic items or secondary tools. The game is designed around a progression ladder where your shovel determines which excavation sites you can access. According to community experience, focusing early resources on upgrading your shovel is the most effective way to reach higher-tier fossil periods and increase your coin-earning potential.
Shovel Progression and Island Access
Progression in Prehistoric Farm is strictly tied to your current shovel tier. As you acquire better tools, you gain access to new islands, each containing unique resources required for further upgrades.
Wooden Shovel
The starter tool. It provides access to the Cambrian digging area and is your primary source of early-game materials.
Bronze Shovel
The first major upgrade. It unlocks the Devonian digging area and requires resources gathered from previous sites.
Silver Shovel
Essential for mid-game progress, this tier expands your reach into the Triassic period.
Iron Shovel
Required to enter the Jurassic period. By this point, efficient management of coins and materials becomes critical.
Titanium Shovel
Currently the highest documented tier. It provides access to the Cretaceous period, marking the endgame for current explorers.
To move up these tiers, you must collect specific shards and gems. Cambrian Island provides Aquamarine shards, Devonian Island holds Red Jasper, Triassic Island yields Desert Topaz, and Jurassic Island is the source of Jungle Emeralds. Always check your inventory before traveling to ensure you have the necessary materials for your next upgrade.
DNA Lab and Hatching Your First Dinosaur
Once you have gathered a full set of fossils—specifically five pieces belonging to a single species—head to the Home Island. Visit Dr. Ivy’s DNA Lab to trade your completed set for a dinosaur egg. It is important to note that adding different species together will not complete a set; focus your collection efforts on one specific creature at a time to avoid a cluttered inventory.
Collect: Find five fossils for a single creature type during your digging sessions.
Trade: Take the completed set to Dr. Ivy at the DNA Lab to receive your egg.
Incubate: Place the egg into an available slot in the incubator.
Hatch: Wait for the timer to finish. Do not expect every hatch to be instant; the duration is based on the specific egg’s growth requirements.
Maintaining Your Ranch and Dinosaur Growth
Hatching is only the first step. Once your dinosaur enters the ranch stage, its growth depends entirely on your care. A common pitfall for new players is failing to keep the animal fed. Your dinosaur’s hunger must remain above 50% for it to continue growing. If it drops to 50% or lower, the growth process halts, effectively stalling your progress.
According to community reports, keep food in your hotbar at all times. When you are on the ranch, equip the food and interact with the dinosaur to feed it. Feeding is not just about survival; a fully grown dinosaur can be ridden, which significantly improves your exploration speed across the various islands. Think of your ranch not just as a display area, but as an active facility that requires regular maintenance between your digging expeditions.
Expanding Your Income: Fishing and Travel
While digging is your primary source of fossils, fishing serves as a reliable secondary income stream. You can purchase a basic fishing rod from the fisherman for 150 coins. Once you have the rod and bait, head to the open sea to cast your line.
Tip
Prioritize catching high-value fish rather than wasting bait on low-tier catches. As your coin supply grows, return to the fisherman to upgrade your rod for better efficiency.
Boats also play a pivotal role in your late-game exploration. While your shovel dictates where you can dig, your boat determines how fast you can reach those locations. Once your shovel progression is stable, allocate some of your excess coins toward better boats to minimize travel time between the islands.
FAQ
How can I get more coins quickly?
Complete the 16-step tutorial provided at the start of the game for an initial bonus of 250 coins. Afterward, maximize your income by focusing on high-tier fossil sets and efficient fishing.
Why isn't my dinosaur growing?
Growth stops if the dinosaur's belly percentage reaches 50% or lower. Ensure you keep it fed above this threshold at all times.
Should I redeem codes?
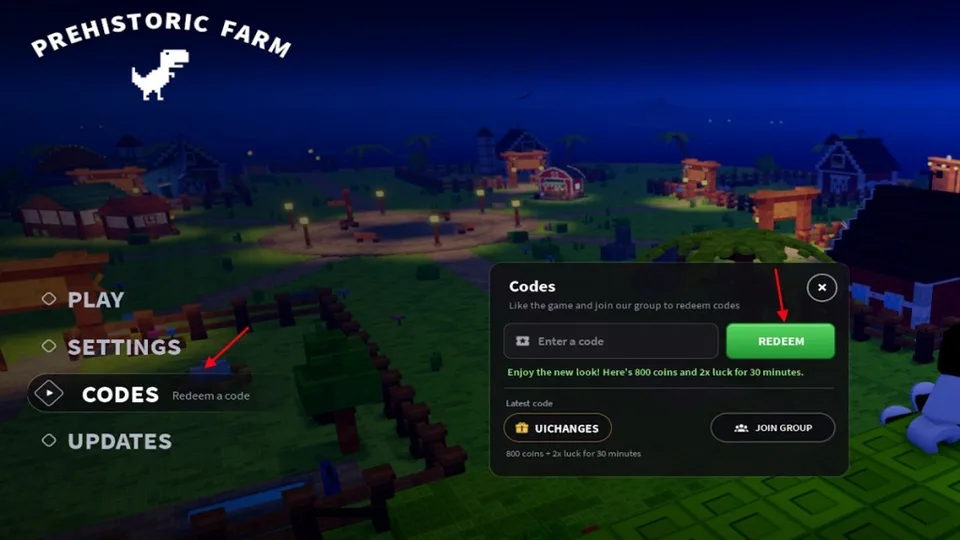
Yes, codes (such as the "UI changes" code mentioned by community sources) can provide significant boosts like 800 coins or luck multipliers. Ensure you are a member of the official Project Mirvy Roblox group if required by the game's redemption system.
Do I need to buy extra incubator slots immediately?
Not necessarily. You start with two slots, which is sufficient for a beginner. Focus on shovel upgrades first, as they provide better long-term progression value.